Installation
Start Apache Answer
There are multiple ways to start Apache Answer, you can choose the one that suits you best.
- Docker compose
- Docker
- Binary
- aaPanel
We recommend using Docker Compose to run Apache Answer. This is the easiest way to get started with Apache Answer.
If you are using Docker Desktop on Windows or Mac, docker-compose is already included. If you are using Linux, you will need to install docker-compose separately.
curl -fsSL https://raw.githubusercontent.com/apache/answer/main/docker-compose.yaml | docker compose -p answer -f - up
The default port for Apache Answer is 9080. You can access it at http://localhost:9080.
You can find all the available Docker images on Docker Hub. The latest tag refers to the latest stable version of Apache Answer.
docker run -d -p 9080:80 -v answer-data:/data --name answer apache/answer:latest
After running the command, heading to http://localhost:9080/install to continue installation.
If you can't access the installation page, you can use the command docker logs answer to view the logs. It may help you find the specific problem.
As a golang project, Apache Answer can be compiled into a binary file. You can download the binary file that matches your operating system from the release page.
INSTALL_PORT=80 ./answer init -C ./answer-data/
After running the command, heading to http://localhost:80/install to continue installation.
Follow the Install Steps to complete the installation. After that run the following command to start the answer again.
./answer run -C ./answer-data/
You can specify the port on which to start the installation by specifying the environment variable INSTALL_PORT, default is 80.
We use -C flag to indicate the directory where saved answer data.
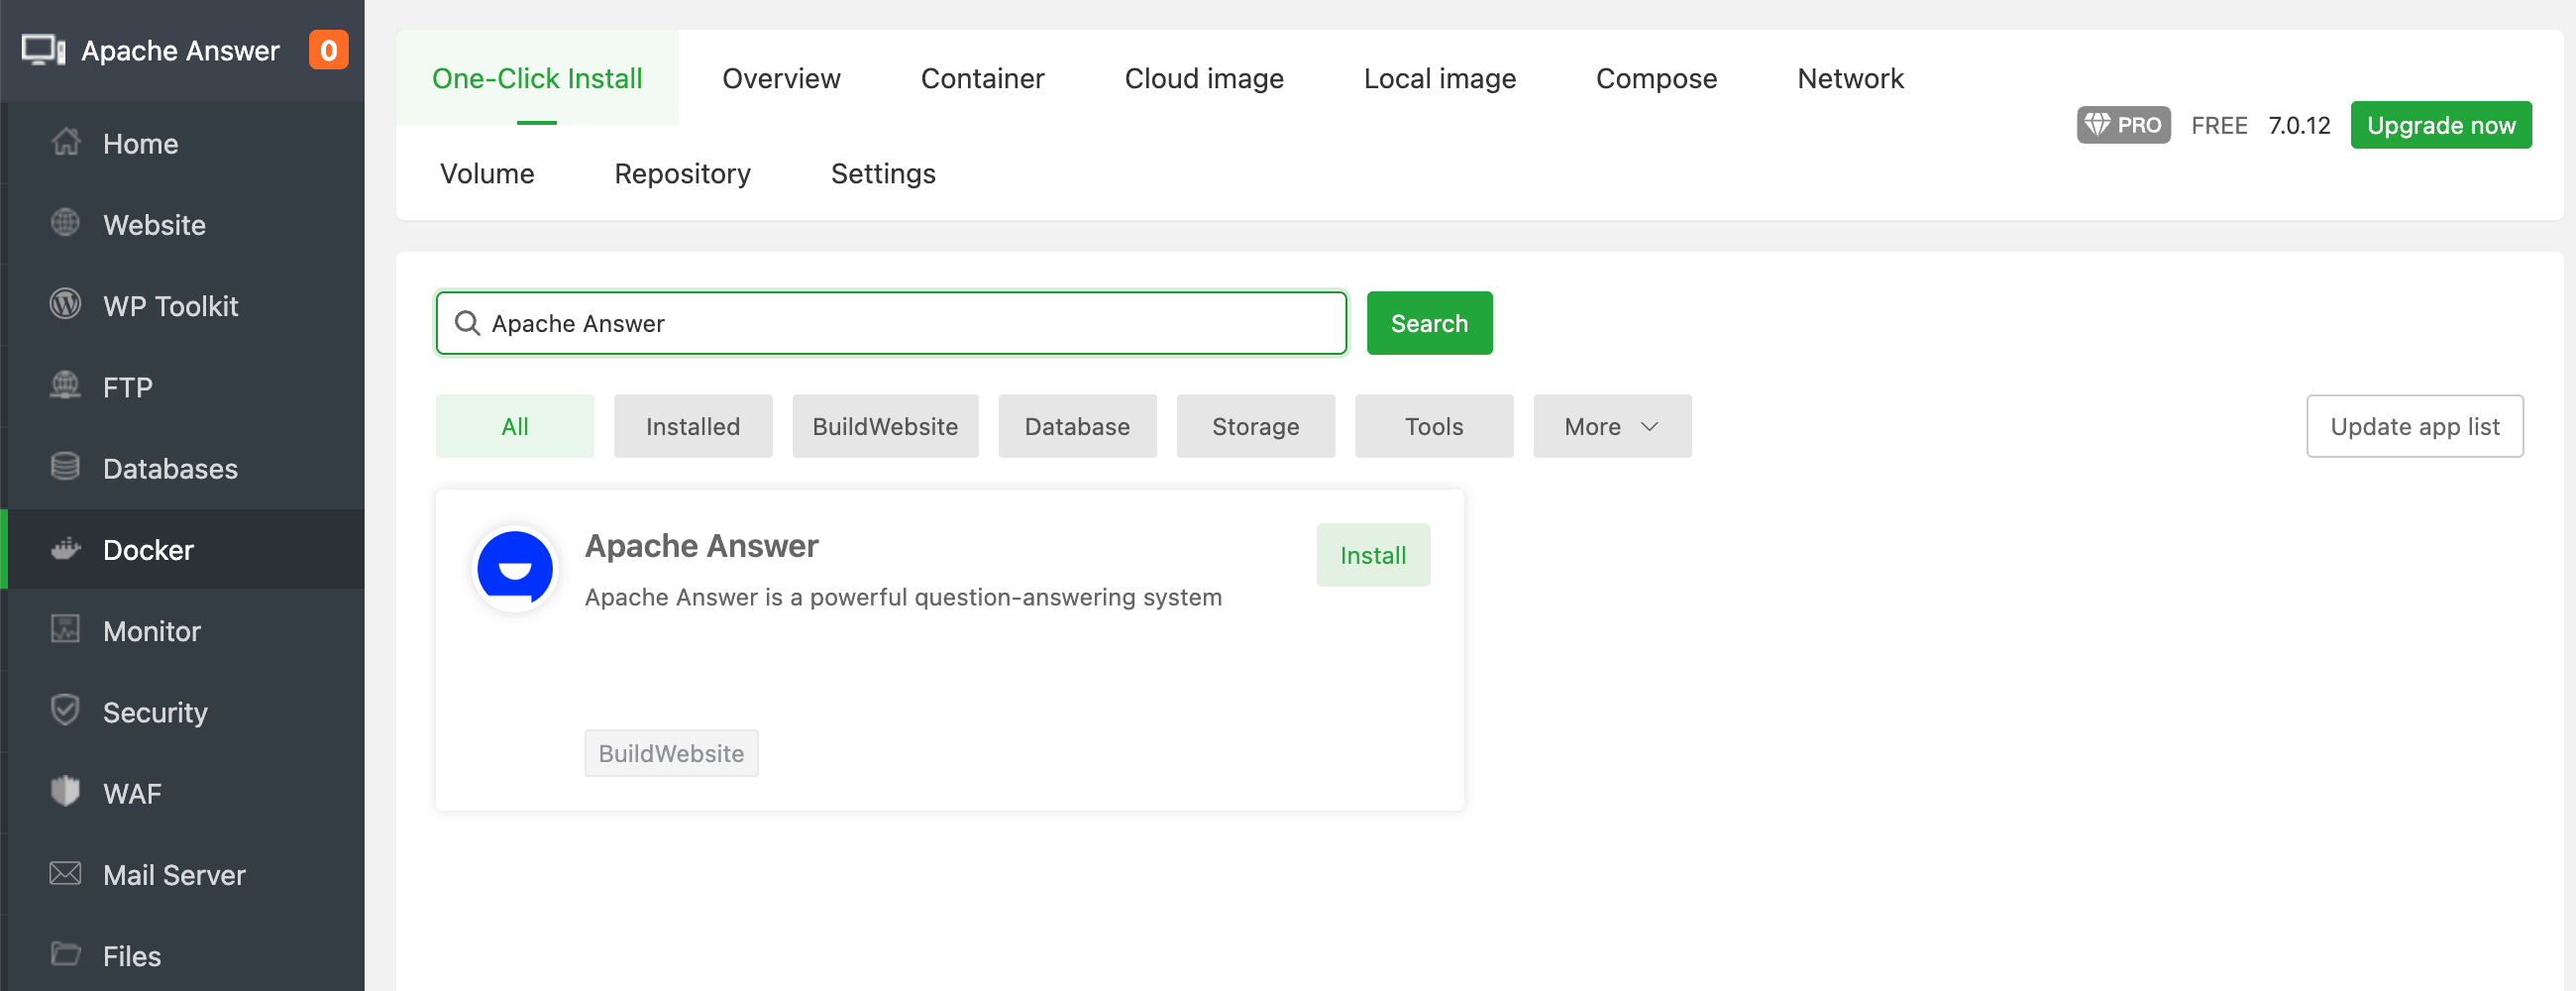
To install Apache Answer on aaPanel, you need to install the aaPanel first. Go to the aaPanel official website, download and install the script.
After the installation is complete, log in to the aaPanel, click the left menu bar Docker, enter One-Click Install, search for Apache Answer, click Install to configure:
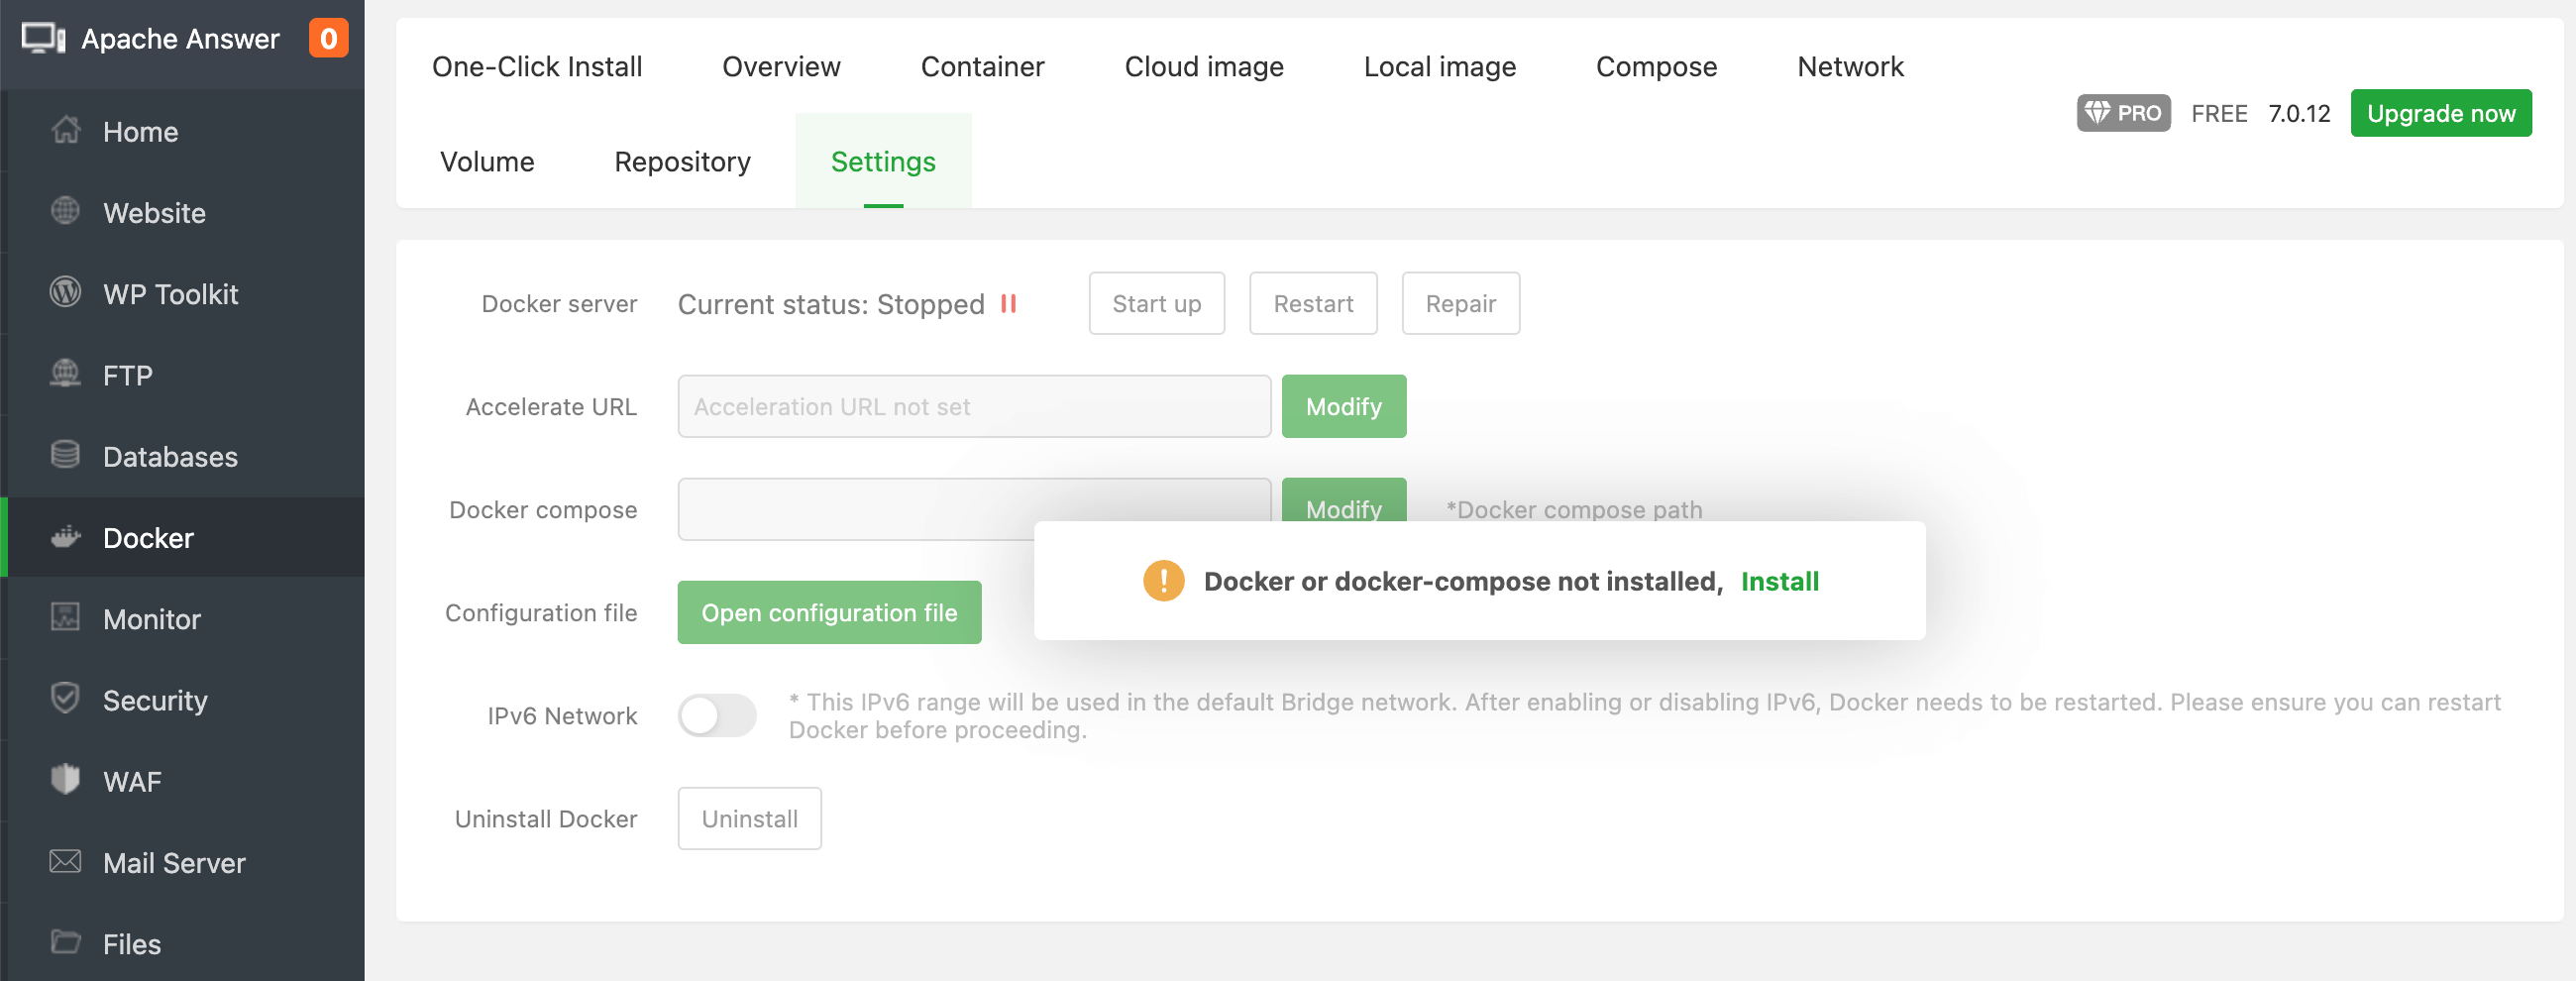
For the first time, you will be prompted to install the Docker and Docker Compose services. Click Install immediately. If you have already installed it, please ignore it.
You need to fill in the following information to complete the basic configuration initialization:
- Name: Application name, default
answer_random characters - Version selection: default
latest - Allow external access: If you need to access directly through
IP+Port, please check it. If you have already set up a domain name, please do not check here - Port: default
9080, you can modify it yourself - Site name: Site name, such as
Apache Answer - Site url: The browser address you will use to access Apache Answer after installation
- Contact email: The email address of the main contact person responsible for this website
- Admin name: Admin username
- Admin password: Admin password
- Admin email: Admin email. You need this email to log in, so be sure to remember the admin's email and password
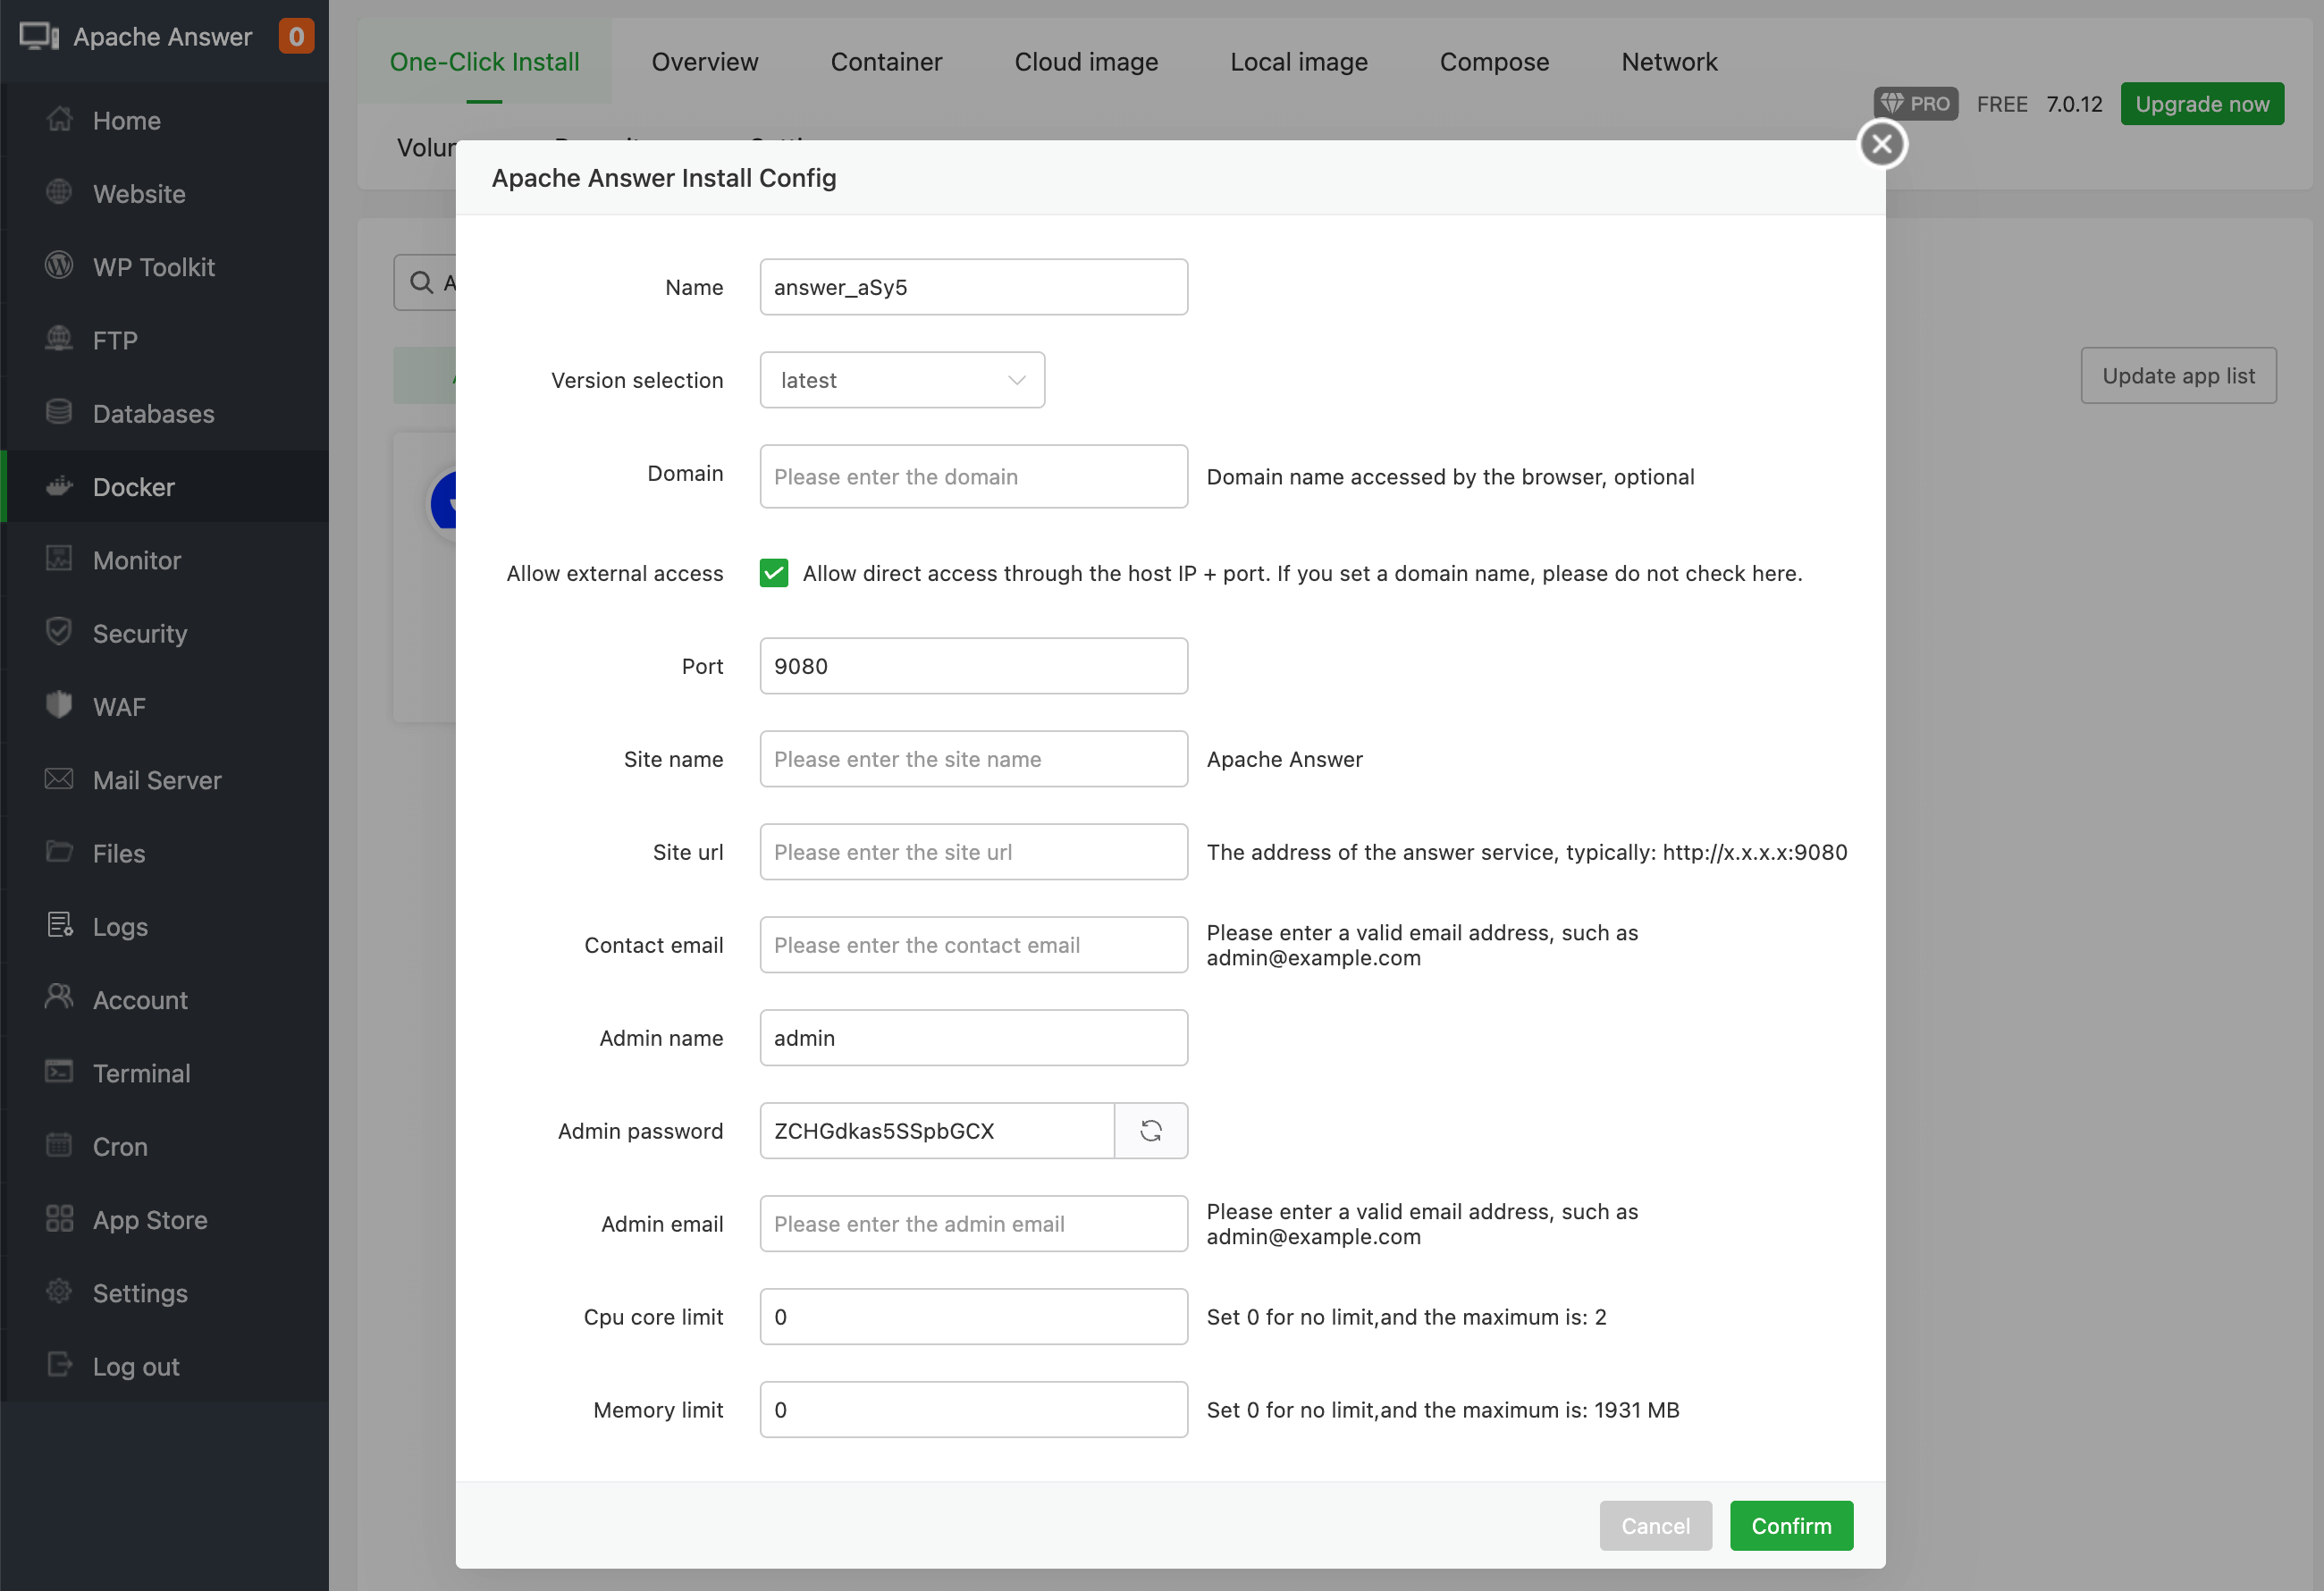
After filling in the information, click Confirm to submit. The panel will automatically initialize the application after you click OK to submit. You do not need to operate the installation steps below. Wait for the initialization to complete, and you can access it through the site URL you just set.
Congratulations, start your Apache Answer journey!
Install steps
After you start the answer, you can follow the steps below to complete the initialization about the basic configuration.
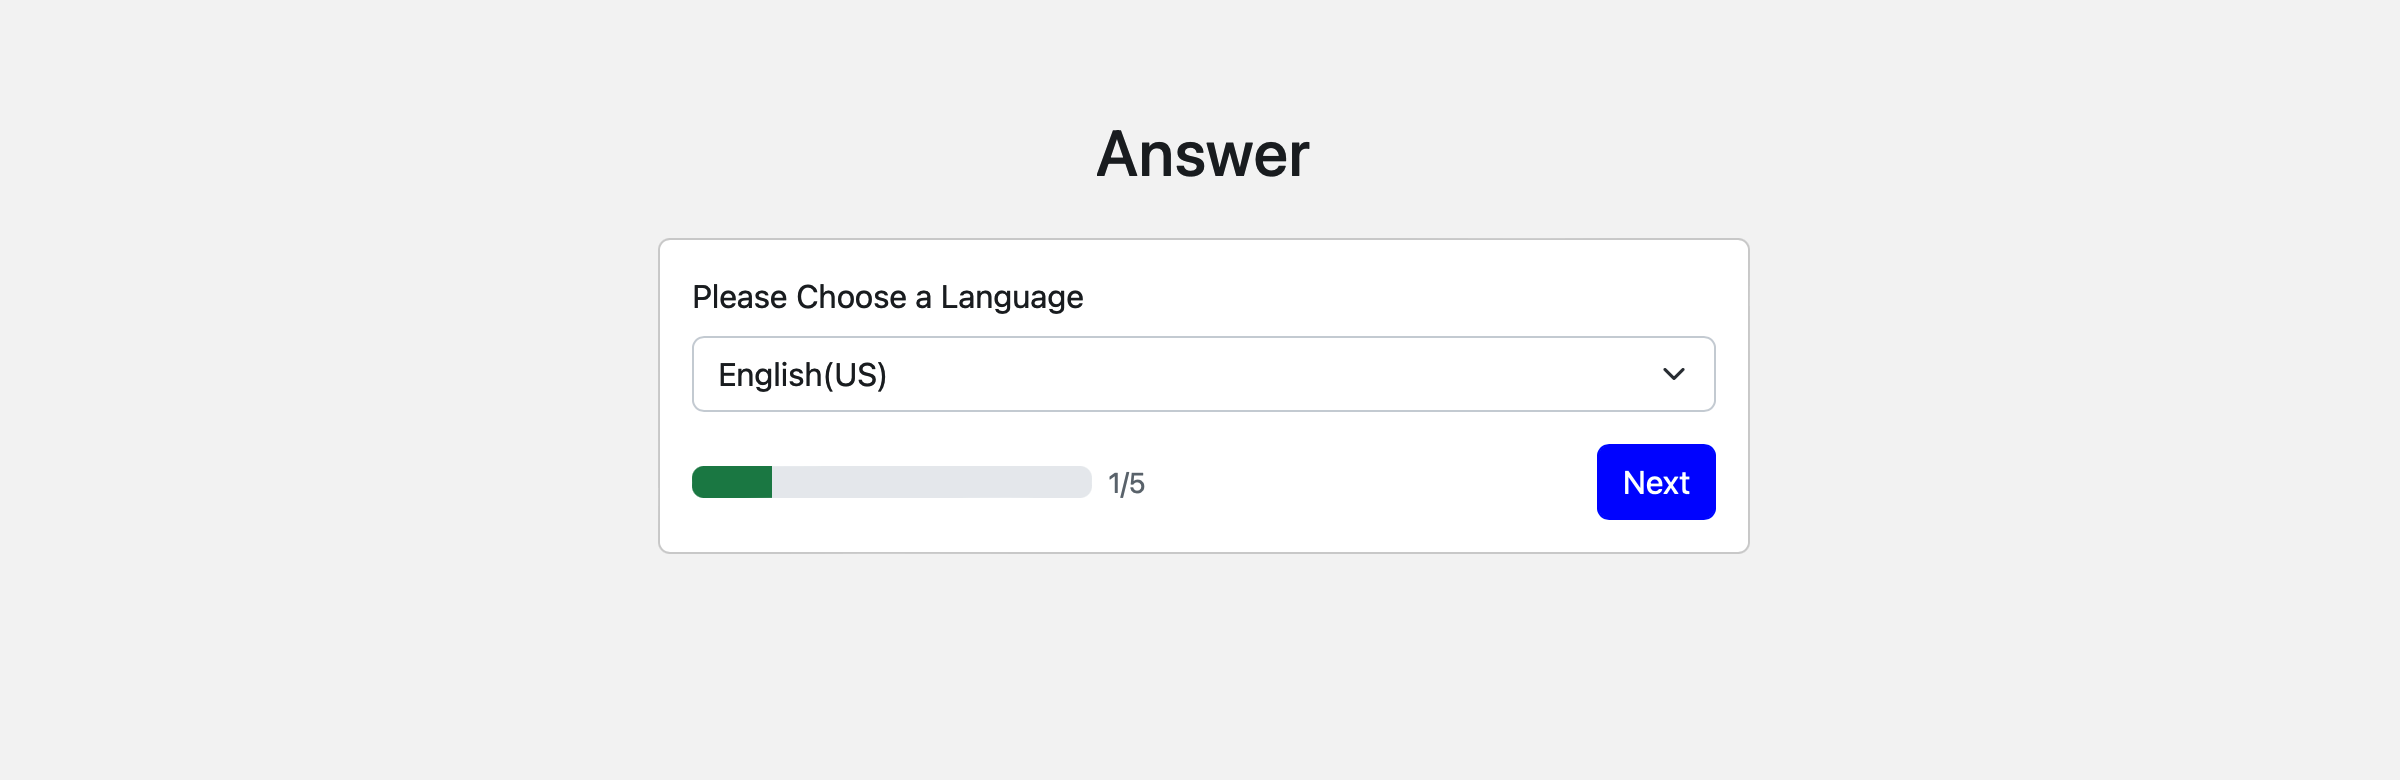
Step 1: Choose the language
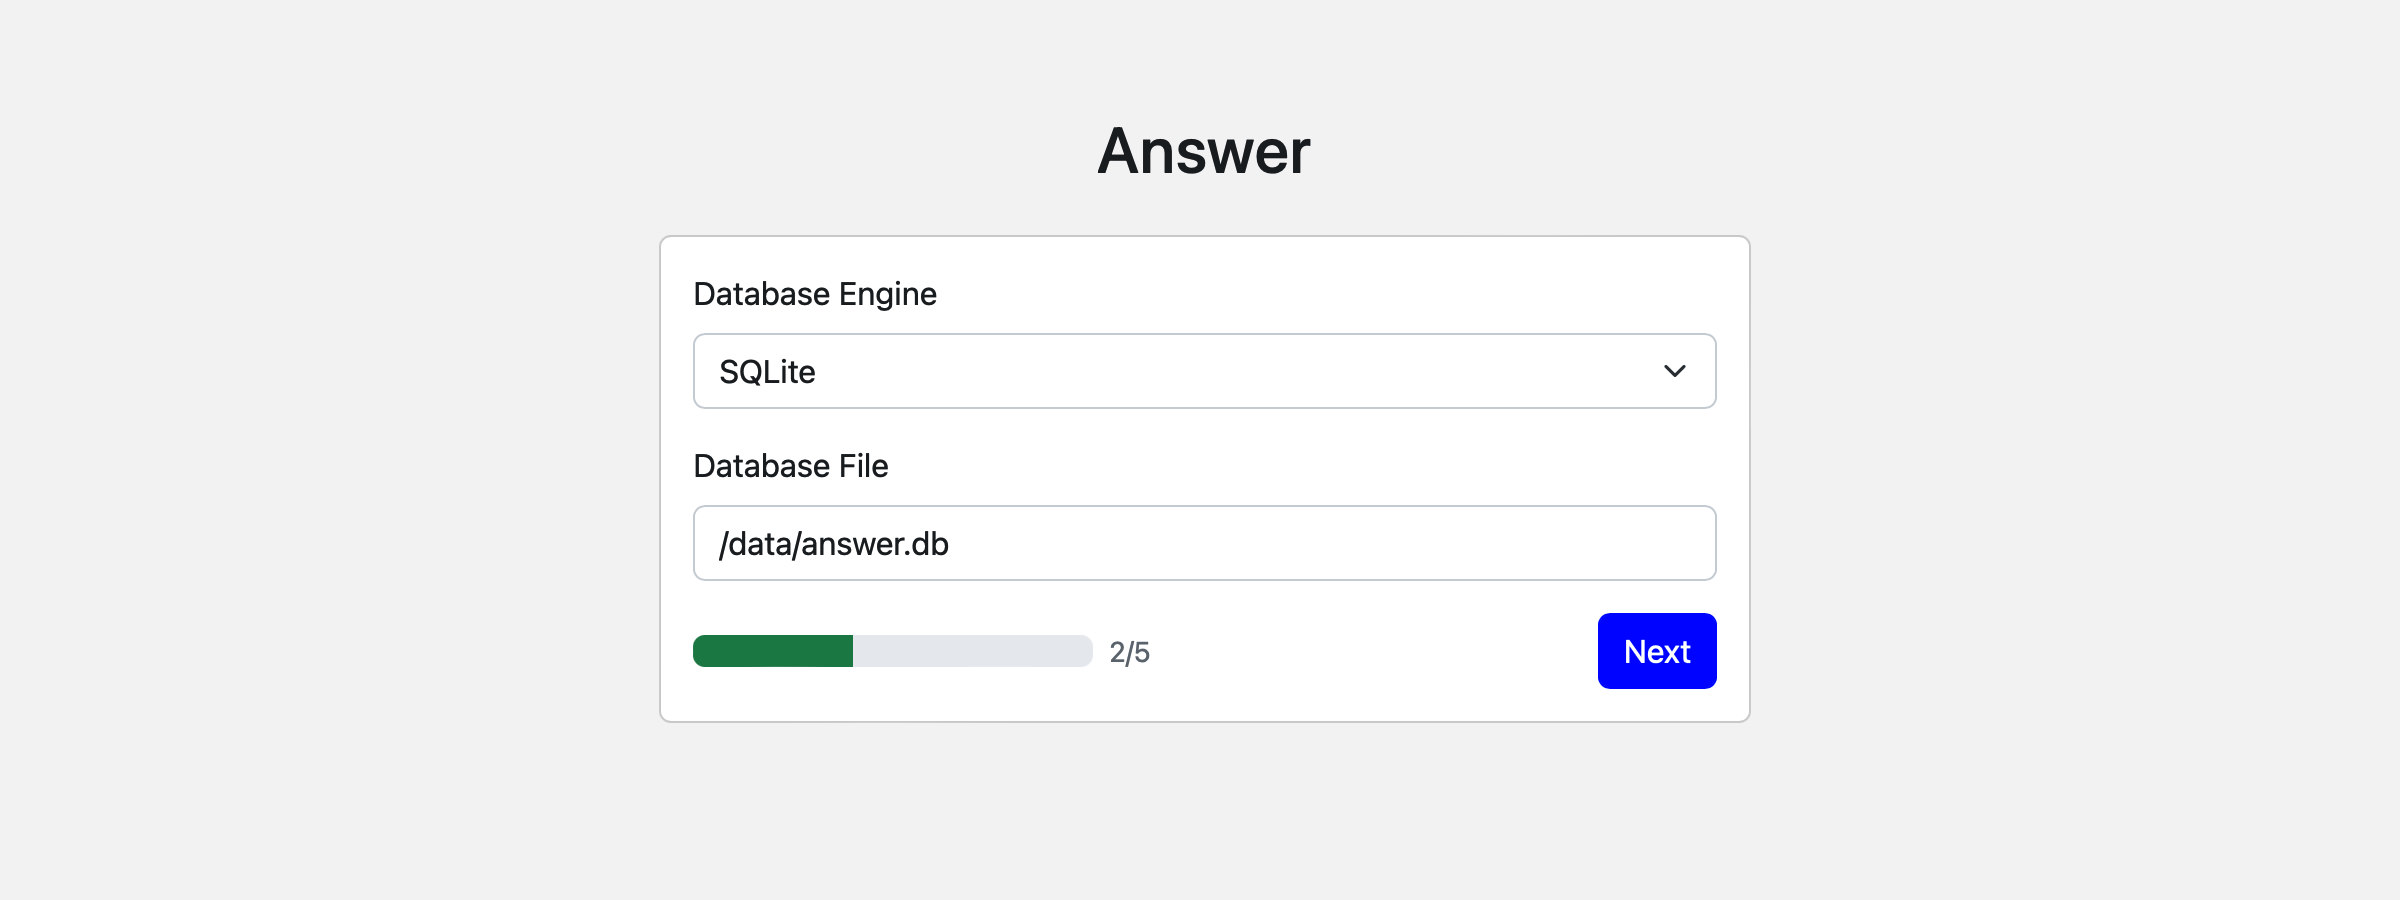
Step 2: Config database
Apache Answer supports MySQL, PostgreSQL, and SQLite as the database backend. The smallest environment is SQLite, which does not require any additional configuration. If you want to use MySQL or PostgreSQL, you need to setup the database first and then configure the database connection in this step. Here we recommend using sqlite3 to complete your first experience.
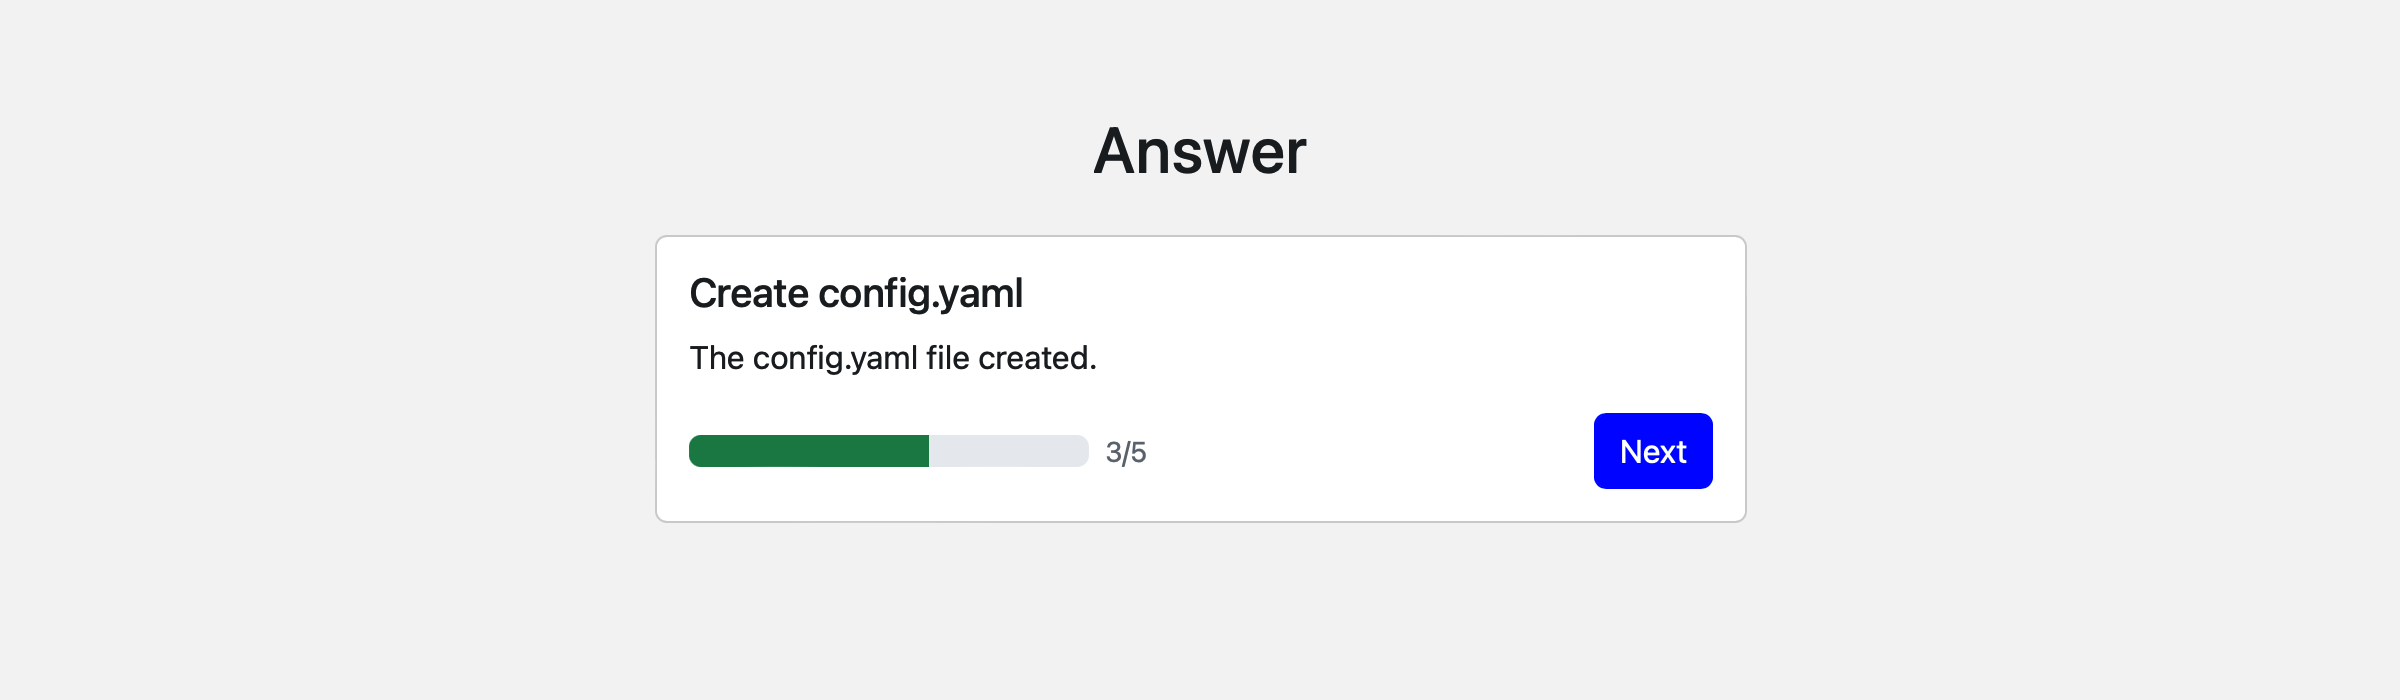
Step 3: Create configuration file
Click Next button to create the configuration file.
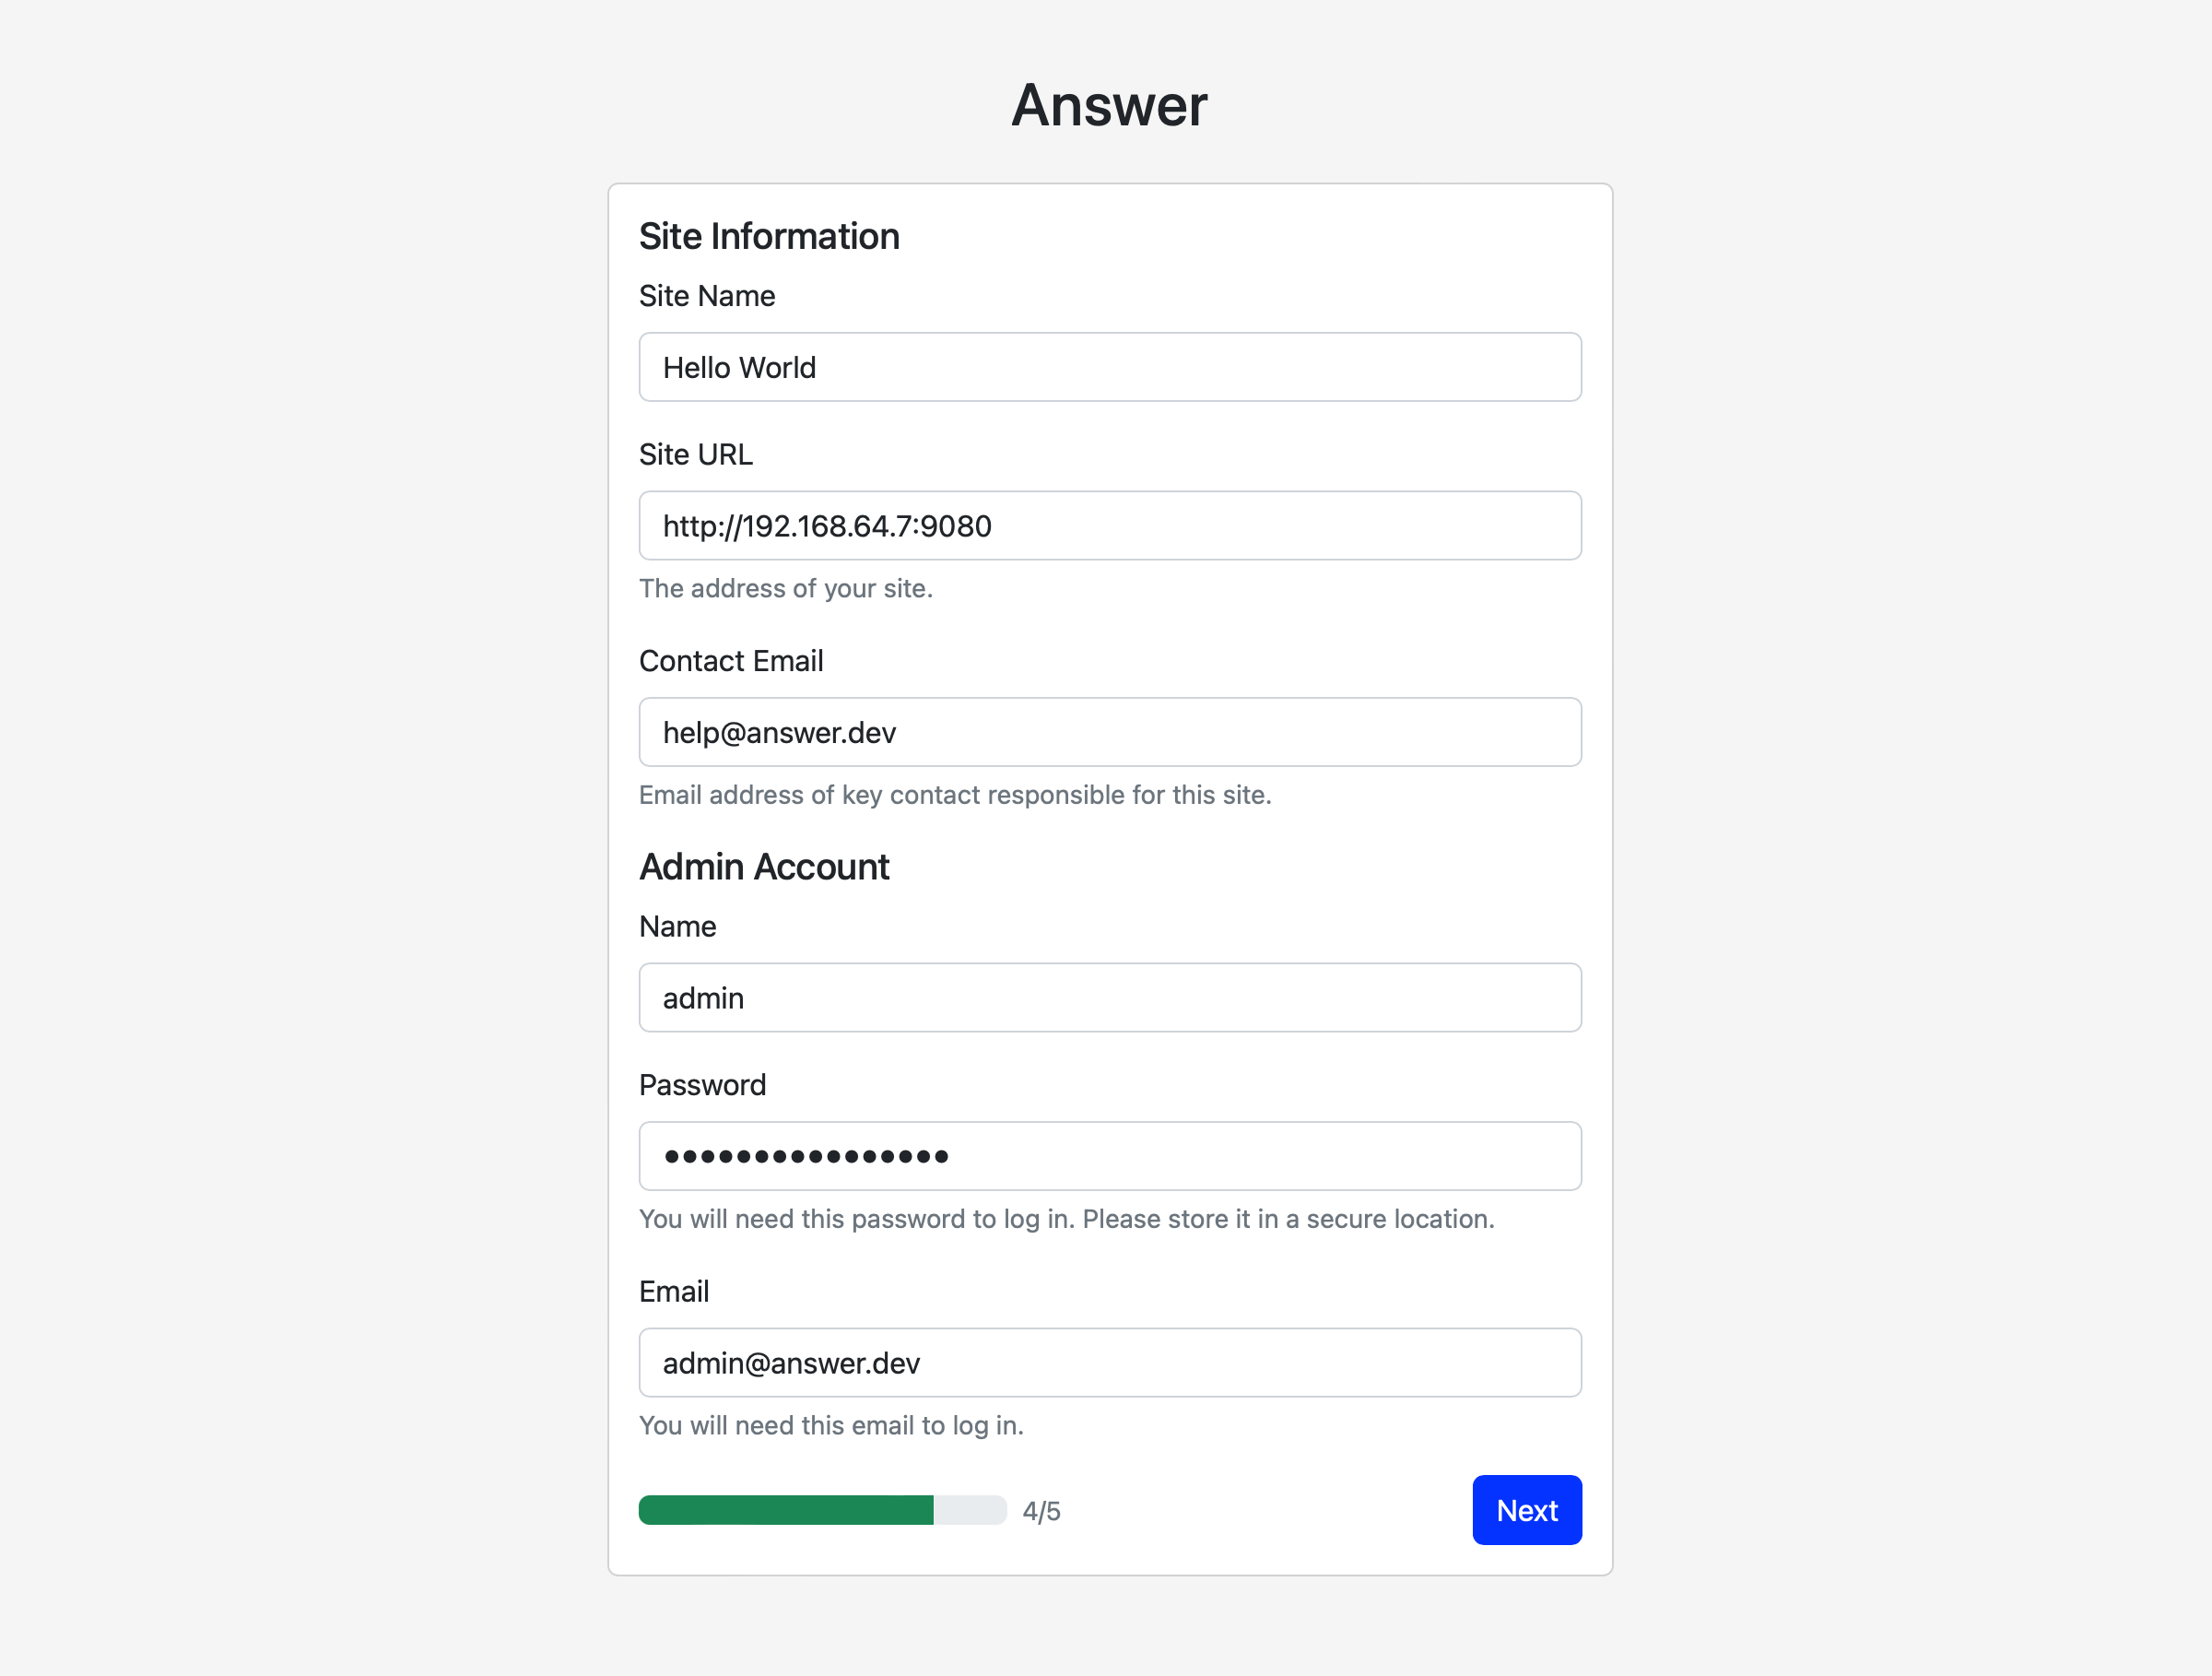
Step 4: Fill in basic information
Site URL is the browser address you will use to access answers after installation. If you are deploying a subdirectory, the site url needs to include the subdirectory's path, eg: https://yourdoamin/{subdirectory}
Don't forget the admin Email and password.
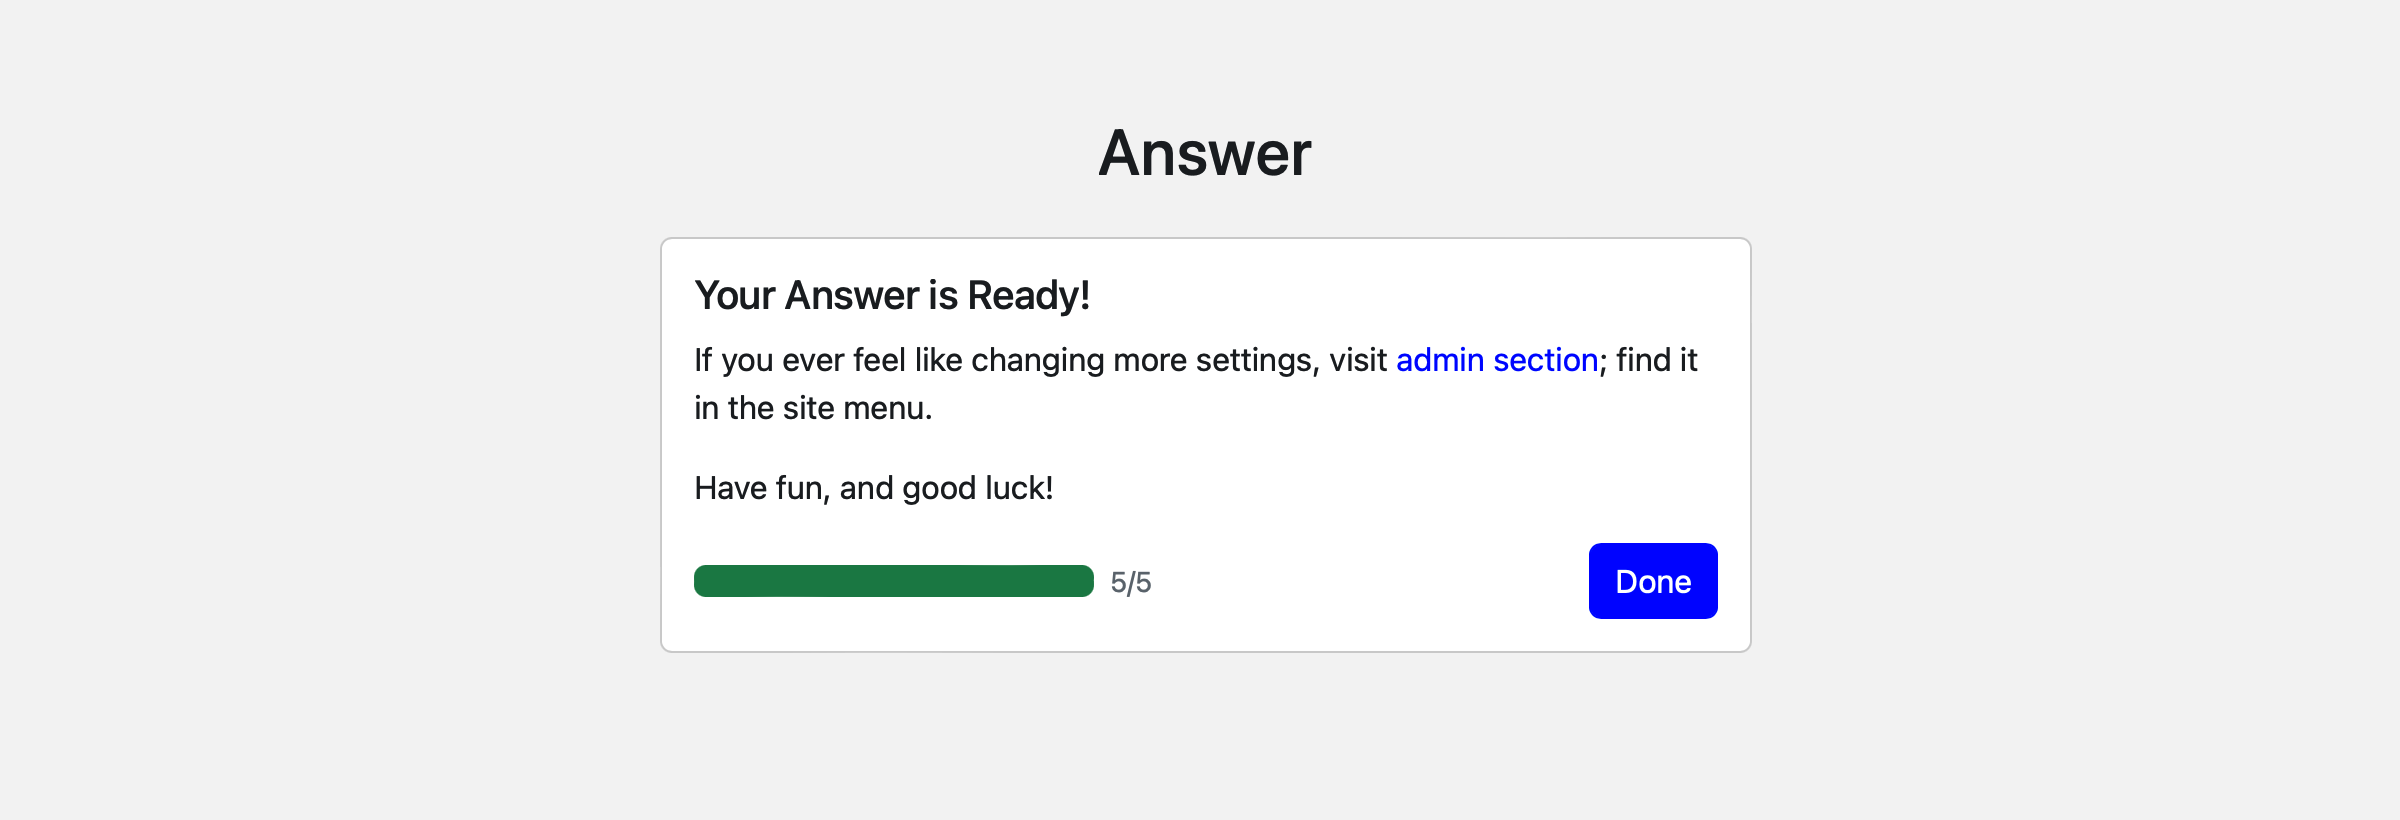
Step 5: Complete
Congratulations, you can click the done button to start your answer journey!